
Florida’s weather can turn fierce in an instant. Central Florida homeowners know that thunderstorms, tropical storms, and hurricanes are a part of life — especially during hurricane season from June through November. When a storm damages your roof, it’s critical to act quickly yet calmly. This expert guide will walk you through practical, actionable steps to take after storm-related roof damage. We’ll cover everything from immediate safety and roof inspection after a storm in Central Florida to temporary tarping, calling a professional roofer, documenting damage for insurance, filing claims, understanding the repair process, and even preventing future storm damage. By following these steps, you can protect your family, preserve your property, and smoothly navigate storm damage roof repair in Florida.
Ensure Immediate Safety First
1. Stay Safe After the Storm: Your first priority after a storm is personal safety, not rushing to fix the roof. Check that the severe weather has completely passed and wait for official all-clear announcements if you evacuated. Even once skies clear, remain cautious — storms can leave behind hidden dangers. Avoid going outside until you’re sure there are no lightning strikes or high winds still occurring.
2. Watch Out for Hazards: When you do step outside, be alert. Look for downed power lines and assume any line is live and dangerous. Stay clear of fallen electrical wires and contact the utility company if you see them. Also steer clear of any standing water around your home — it could conceal sharp debris or even carry an electrical charge from hidden wires. If you smell gas or suspect a leak, turn off the gas supply if you know how, then immediately leave and call authorities.
3. Use Protective Gear: Don’t walk around storm debris in flip-flops or shorts. Wear sturdy shoes, work gloves, and long sleeves/pants when checking your property. This will protect you from nails, broken glass, and splintered wood. In heavily damaged areas, consider safety glasses and even a hard hat. It’s easy to get cut or injured after a storm, so dress for safety.
4. Avoid Unsafe Areas: Do not enter rooms or buildings with structural damage (like a collapsed roof section) until professionals deem it safe. If part of your roof caved in or a large tree fell on your house, there could be unstable structures. When in doubt, keep everyone out of that area and wait for experts. Safety comes before any inspection or repair work.
Conduct a Careful Roof Inspection After the Storm
Once you’ve addressed immediate safety, you can assess your roof damage — but do it cautiously. A proper roof inspection after a storm in Central Florida often starts from the ground. Do not climb onto a wet or damaged roof unless you are experienced and it’s absolutely safe; many injuries occur from falls after storms.
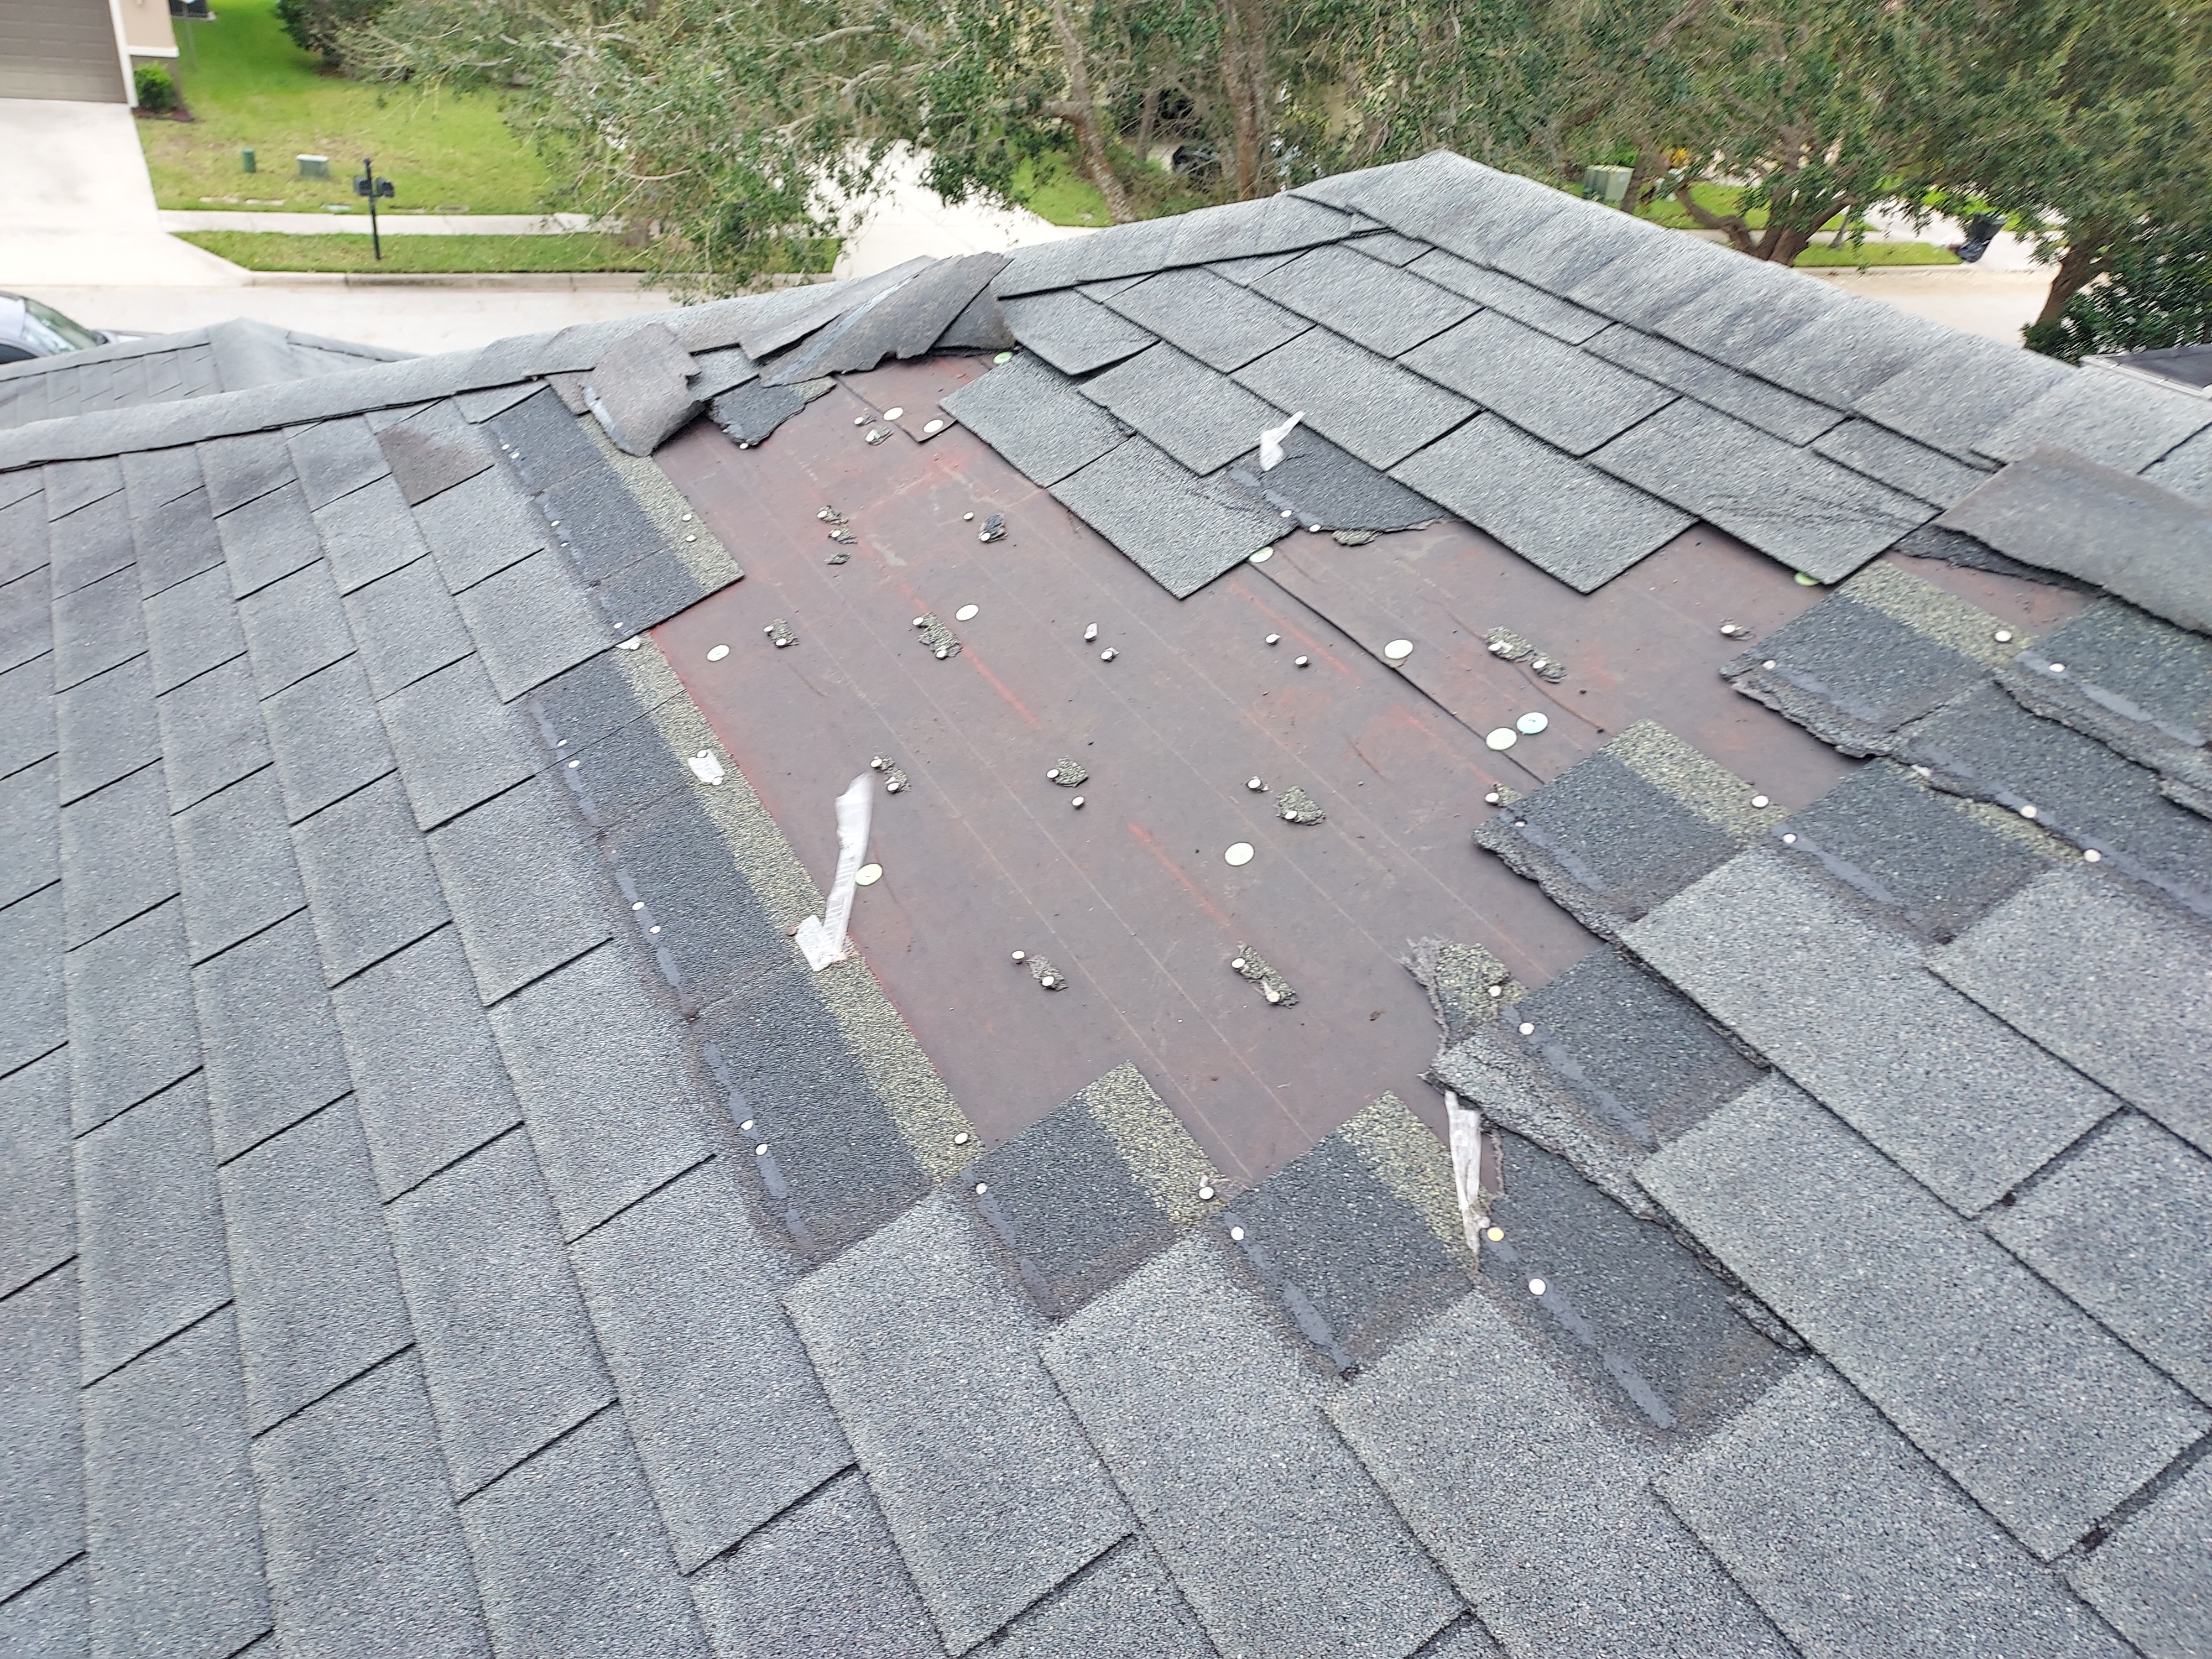
1. Inspect from the Outside: Walk around your property and visually inspect the roof and exterior. Look for obvious signs of damage such as missing shingles, broken or uplifted metal panels, cracked tiles, or pieces of roofing on the ground. Note if any trees or large branches have fallen on the roof. Check for damage to gutters, downspouts, or exterior vents which could indicate wind or impact damage. Also glance at windows, siding, and doors for cracks or gaps caused by wind pressure.
2. Check the Interior: Next, go inside your home (again, only if it’s safe) and look for signs of leaks or water intrusion. Tell-tale indicators include water stains on the ceiling or walls, bulging or bubbling paint, damp spots, or drips. In the attic, if accessible, use a flashlight to spot wet insulation, puddles, or holes where light shines through. These clues help pinpoint where the roof is compromised. Even small leaks can signal missing shingles or flashing, so inspect each room, especially upstairs ceilings.
3. Document What You Find: While inspecting, take clear photos or videos of all damage you can see. Photograph the roof from multiple angles, zooming in on torn shingles or debris. Also document interior damage — for example, a wet ceiling or damaged belongings. Make a list of damaged items (like furniture or electronics) and save any pieces that broke off (shingles, etc.). This documentation is not only for your own understanding, but it will be vital for insurance claims later. The more evidence you have, the smoother your insurance process will be.
4. Be Thorough and Cautious: It may be tempting to climb on the roof for a closer look, but remember that a storm-damaged roof could be unstable. If you see serious structural problems — such as a sagging roof deck or a large hole — do not attempt to go up there yourself. Binoculars can help you inspect from the ground. If you’re unsure about the extent of damage, it’s best to wait for a professional roofer or insurance adjuster to make a detailed assessment.
Protect Your Roof from Further Damage (Temporary Repairs)
After a storm, preventing additional damage is key. If your roof has openings (holes, missing sections of shingles, leaks), you’ll want to secure it quickly to keep rain out until permanent repairs can be made. This often means using a tarp or other temporary cover.
Use a Tarp for Emergency Protection: One of the quickest ways to halt further water damage is to cover the affected part of your roof with a waterproof tarp. Heavy-duty tarps (typically blue plastic sheeting) are designed to keep rain from pouring into exposed areas. Secure the tarp over damaged sections — usually by anchoring it with wood planks, nails, or sandbags around the edges — to create a temporary patch on your roof. This can protect your home’s interior for days or weeks until a proper repair is done. In fact, after major hurricanes, programs like the U.S. Army Corps’ “Operation Blue Roof” provide reinforced blue tarps to homeowners as a stopgap. You can install a tarp yourself if you’re comfortable on a ladder and the roof is safe; otherwise, many roofing companies and even local emergency services can help with emergency roof repair Orlando homeowners might need right after a storm.
Take Action Quickly: Don’t delay on temporary fixes. Florida insurance policies require homeowners to mitigate further damage after a loss — meaning you should make reasonable temporary repairs to prevent things from getting worse. If you fail to cover a known roof hole and more rain causes extra harm, the insurer might not cover that subsequent damage. As experts advise, “if it’s possible to take precautions to prevent further damage (e.g. placing a tarp over a damaged roof) try to do that as soon as possible,” since insurance may not cover damage that occurs after the storm passes. Save receipts for any materials like tarps or emergency labor, because these costs might be reimbursable later.
Safety First: Only attempt to tarp your roof if conditions are safe. Never climb on a roof during a storm or high winds. Use proper ladder safety and ideally have someone assisting. If the roof is steep or slick, or the damage is extensive, it’s wiser to wait for a professional. Many reputable roofing companies in Central Florida offer emergency roof repair services and can install tarps securely for you.
Call a Professional Roofing Company
With initial damage controlled, your next step is to arrange for professional help. An experienced roofer can accurately assess the damage and propose permanent repairs. Knowing when to call a professional roofer is important — generally, the sooner, the better once immediate hazards are addressed.
1. Prioritize Professional Inspection: Even if damage seems minor, it’s smart to have a licensed roofer examine your roof after a major storm. They might spot hidden issues (loose shingles, cracked flashing, structural concerns) that you missed. A qualified roofer will provide a detailed assessment and an estimate for storm damage roof repair Florida homeowners will need. This inspection also helps you understand whether you just need repairs or if a full roof replacement is warranted.
2. Choose a Reputable Local Contractor: It’s best to contact a trusted Central Florida roofing company with a strong local reputation. Local companies are familiar with Florida’s building codes, common storm damage patterns, and insurance claim procedures. Be wary of “storm chasers” — out-of-town, unlicensed contractors who flock to neighborhoods after a big storm. Unfortunately, post-storm recovery can attract unlicensed people looking to take advantage of homeowners, so only work with licensed, insured professionals and avoid anyone who demands full payment upfront. A legitimate Central Florida roofing company will have a Florida contractor’s license and insurance, and will be happy to provide credentials and local references.
3. Avoid Scams and Pressure Tactics: You might encounter door-to-door repair offers or individuals urging you to sign a contract immediately. Use caution. Florida’s Chief Financial Officer warns storm victims: “do not sign anything” from strangers offering help right after a disaster, since you could unknowingly sign away your rights or assignment of your insurance benefits. Take your time to review any paperwork. A quality roofer will inspect damage and explain your options — without high-pressure sales tactics. Trust your instincts: if someone is overly pushy or “too good to be true,” seek another opinion.
4. Know When It’s an Emergency: If your roof damage is severe — for example, there’s a gaping hole, water pouring in, or a structural collapse — treat it as an emergency roof repair situation. Many roofing contractors (including those in Orlando and Central Florida) have emergency response teams for such scenarios. They can often come out quickly to stabilize the situation (like installing a tarp or doing quick patching) to prevent a catastrophe from getting worse. Don’t hesitate to call 24/7 emergency numbers if your home’s interior is exposed or unsafe due to roof damage. It’s better to get a pro on site sooner to protect your property.
Document the Damage for Insurance
Filing an insurance claim is usually a major part of storm recovery. To maximize your claim and speed up the process, thorough documentation is essential. You’ve hopefully already started photographing and listing damages during your inspection; now organize that information.
1. Take Photos and Video Evidence: Insurance adjusters will want to see proof of all the damage. Provide clear, well-lit photos of every affected area. This includes wide shots of your roof and yard showing debris, as well as close-ups of things like missing shingles or holes. Inside, photograph water stains, damaged furniture, wet flooring — any property that was harmed by the storm. It’s a good idea to time-stamp or note the date of your photos (most smartphones do this automatically). If possible, video can capture a walkthrough of your home pointing out damage in context.
2. Inventory Damaged Property: Make a detailed list of what was damaged or lost. Note the approximate value of each item (especially high-value items). For example, list how many sections of fence blew down, or which electronics were ruined by water. Don’t forget to include structural elements (like “10 ft of gutter torn off” or “shingles missing on north slope of roof”). This written inventory complements your photos and helps ensure nothing is overlooked in the insurance claim.
3. Save Receipts and Expenses: Keep receipts for any immediate repairs or expenses you’ve paid due to the storm. Did you buy tarps, nails, or plywood? Did you have to book a hotel for a night because your home was unlivable? These costs may be reimbursable under your policy. Also record any payments to contractors for emergency services. Organize these receipts with your documentation.
4. Don’t Throw Anything Away Yet: Do not discard damaged items or materials until the insurance adjuster has seen them (unless they pose a safety hazard). For instance, if your carpet got soaked and ruined, you can pull it out to prevent mold, but keep a piece of it or at least photograph it clearly. Insurance experts advise not to throw away damaged goods until an adjuster has had a chance to inspect them. The same goes for pieces of your roof that blew off — save shingles or tiles if you can do so safely. This evidence can support your claim.
5. Get Repair Estimates: It can be helpful to obtain a written estimate from a roofing contractor for the recommended repairs or replacement. While the insurance company will send their own adjuster, having a professional roofer’s perspective and quote gives you a benchmark. It can also expedite the claim if you provide this to the insurer. Make sure the contractor’s estimate is detailed (listing the needed work and costs).
Filing an Insurance Roof Claim in Florida
With evidence in hand, it’s time to file your insurance roof claim. In Florida, storm damage claims are common, so insurers have processes in place — but you need to follow the proper steps and timelines.
1. Contact Your Insurer Promptly: As soon as you’ve documented the damage, notify your homeowner’s insurance company about the loss. Most insurers have 24/7 claim hotlines or online claim reporting, so you can report the damage immediately. Florida law now requires property damage claims to be reported within one year from the date of the storm, but you should never wait that long. In fact, policies demand “prompt notice,” so the faster you call, the better. When you contact them, be ready with your policy number and a summary of what happened (date of storm, type of damage).
2. Understand Your Coverage: Take a moment to review your insurance policy coverage (the “Declarations Page” of your policy is a handy summary). Most standard Florida homeowners policies do cover wind and hail damage — which includes storm wind tearing off shingles or hail hitting the roof — and they usually cover rainwater damage if the rain entered through a storm-caused opening in the roof or structure. However, flooding (rising ground water) is not covered by standard homeowners insurance and requires a separate flood policy. Know your deductible amount too (hurricane deductibles in Florida are often higher). Being clear on your coverage helps you discuss the claim intelligently with the adjuster.
3. File the Claim and Get a Claim Number: When you initiate the claim, the insurance company will assign a claim number — write this down and use it in all communications. Provide them with the basic information they request. You don’t need to submit all your photos and lists immediately; usually, an insurance adjuster will be assigned to inspect the damage in person.
4. Coordinate the Adjuster Visit: The insurance company will schedule an adjuster to come out and examine your roof and home. Be present for this inspection if at all possible. It helps to walk through the property with the adjuster to point out everything and ensure nothing is missed. Share your photos, lists, and any contractor estimates you obtained — this can help the adjuster see the full scope. Take notes during the meeting, and get the adjuster’s contact information. Remember, the adjuster works for the insurance company, but you have the right to ensure they see all the damage.
5. Keep Records of Communication: Maintain a log of all interactions with your insurer. Every phone call, email, or letter — jot down the date, the person you spoke with, and a summary of what was said. If you get promises or instructions, having them written down is useful. This record can be invaluable if there are any disputes or delays in the claim process.
6. Know Your Rights: Florida has a Homeowner Claims Bill of Rights that outlines the timeline and rights you have during an insurance claim. For example, insurers must acknowledge your claim within 14 days and send an adjuster within a certain timeframe. If you feel the process is stalling or you’re overwhelmed, you can consider hiring a licensed public adjuster to help advocate for you (they work on your behalf, not the insurer’s). While many claims go smoothly, it’s good to know help is available if needed.
Understanding the Roof Repair Process
Once your claim is filed and the initial shock of the storm has passed, focus on the permanent repair or replacement of your roof. Here’s what to expect in the roof repair process:
1. Insurance Approval and Choosing a Contractor: After the adjuster’s inspection, the insurance company will determine what repairs they will cover and issue a settlement offer. Review this carefully. If you’ve already identified a reputable roofer (for instance, the Central Florida roofing company you called earlier), you can discuss the insurance estimate with them. Often, your roofer can even talk directly to the insurer if there are discrepancies. Obtain a formal contract for the work from your chosen contractor. Make sure it outlines the scope of work, materials to be used, timeline, and price. Avoid contractors who demand a full payment upfront — a reasonable deposit is normal, but the final payment is usually after the job is done to your satisfaction.
2. Repair vs. Replacement: The contractor will advise whether your roof can be repaired or if it needs a full replacement. This depends on the extent of damage, the roof’s age, and local building codes. In Florida, if a large portion of the roof is damaged, building codes may require upgrading the entire roof section to current standards rather than patching. Your insurance should pay for what is necessary to restore your roof to pre-storm (or up-to-code) condition. If only a few shingles are missing, a repair may suffice; but widespread damage or older roofs often lead to a complete replacement for long-term reliability.
3. Permitting and Scheduling: Legitimate roofing contractors will handle any required building permits with your city/county before work begins. Once approved, they’ll schedule the work. After a major Central Florida storm, be aware that many homeowners are scheduling repairs simultaneously — so crews and materials might be in high demand. Communicate with your roofer about expected start dates and duration. They should also explain how the work will be done — for instance, if they’ll lay tarps around your home to catch debris, how they’ll dispose of old materials, etc.
4. During the Repair: On the start date, the roofing crew will arrive and begin work. For a roof replacement, they typically remove all the old shingles/tiles (down to the roof decking), inspect the decking for any damage, replace any rotten wood, then install new underlayment and new shingles/roofing material. If it’s a repair, they’ll target the specific areas to fix. It’s normal for this process to be noisy and for your yard to have some materials around. A good contractor will keep the site as tidy as possible and protect your property (covering bushes, etc.). If you’re curious, ask the project manager to walk you through what they’re doing — understanding the process can be reassuring.
5. Final Inspection and Warranty: Once the repair or replacement is finished, the contractor should do a final walkthrough with you. Together, you’ll check that the work is completed properly. They should also ensure all debris (old nails, shingles) are cleaned up — many use magnets to pick up nails from your yard. Make sure any vent or flashing work was done, and that gutters are reattached if they were removed. Verify that the roof looks even and properly finished. At this stage, you’ll also receive any warranty information — many new roofs come with manufacturer warranties on materials and a workmanship warranty from the contractor. Keep these documents along with your insurance papers.
6. Payment and Insurance Wrap-Up: If insurance is covering the cost, often the payment comes in two checks (one initial, one after you show proof of completion). Work closely with your insurance and contractor to handle payments. Do not pay the contractor in full until the job is 100% done and any required building inspection (from the city) has signed off. Then, enjoy the peace of mind of having a sound roof over your head again!
Preventing Future Roof Storm Damage
After going through one storm, you’ll understandably want to minimize damage from the next one. While we can’t control the weather, we can strengthen our homes and be prepared. Here are tips to help prevent future storm damage to your roof:
-
Regular Roof Maintenance: One of the best defenses is keeping your roof in good shape year-round. That means annual or semi-annual roof inspections (for example, once before hurricane season). A professional can spot and fix vulnerabilities — like loose shingles, small leaks, or weak spots — before a storm exploits them. Also perform your own periodic checks from the ground. Clean your gutters and downspouts regularly so rainwater can flow away — clogged gutters can cause water to back up under your roof edge. Remove any debris (leaves, branches) from your roof and trim overhanging tree limbs away from the house. Overgrown branches can break off in wind and damage the roof, so keeping trees trimmed is crucial.
-
Fortify Your Roof Structure: If you’re repairing or replacing your roof, ask your contractor about wind-resistant upgrades. For instance, use roofing materials rated for high winds — many architectural shingles now are rated for 130+ mph winds. Ensure the roof decking and trusses are securely attached; modern building codes in Florida require things like hurricane clips or straps that tie the roof to the walls. If your home is older, you can have a contractor add hurricane straps to reinforce that connection. Consider installing a secondary water barrier (a self-adhering underlayment) under the roof covering for extra leak protection. These measures can dramatically increase your roof’s storm survivability.
-
Wind Mitigation Discounts: Many of these improvements not only make your house safer, but also cheaper to insure. In Florida, insurance companies are required to offer discounts or credits for homes with approved wind mitigation features (like impact-resistant windows, reinforced roofs, or hurricane clips). After you fortify your home, have a wind mitigation inspection done and submit it to your insurer — you could save on premiums. It’s a win-win: a stronger roof and a lower insurance bill.
-
Be Prepared Each Storm Season: Don’t wait for the next storm warning to start thinking about your roof. Each year, as storm season approaches, do a preparedness check. Clear the yard of any loose items that could become wind-borne missiles. Double-check that your roof doesn’t have any loose shingles or tiles — if it does, get them fixed promptly. Having a relationship with a local roofing company can also be helpful, so you know who to call for an inspection or emergency. A little preparation goes a long way in preventing storm damage.
Call to Action: Protect Your Roof — We’re Here to Help
Facing roof damage can be overwhelming, but you don’t have to handle it alone. Orange Contracting and Roofing is a trusted, licensed Central Florida roofing company ready to assist you with storm damage inspections, emergency repairs, and quality roof restoration. We have deep experience in storm damage roof repair in Florida, from minor leaks to full roof replacements. Your safety and satisfaction are our top priorities.
Don’t wait for small issues to turn into big problems. Schedule a roof inspection after the storm with our expert team today. We will thoroughly assess your roof, provide honest recommendations, and even guide you through the insurance claim process. Our professionals will ensure your roof is fully repaired and fortified to withstand future storms.
Call Orange Contracting and Roofing at 407-205-2676 or email [email protected]
The company’s office is located at 105 Candace Dr., Suite 129, Maitland, FL 32751. Taking this step can help ensure a home is well-prepared to face the demands of the Central Florida climate for years to come.
Protect your home and family — get your storm-damaged roof fixed now. We’re here to help every step of the way!